Remember the trailer? This one, the one that almost killed us?

We left the shantyboat hull pretty complete. Now that the boat is ready to be flipped, we turn our attention back to the trailer.
 It is really a rusty, janky old thing. Ive owned it for fifteen years or so, or sorta owned it since I bought it with Sean for our Burning Man theme camp, the Costco Soulmate Trading Outlet. Its been stolen and recovered, broken and repaired on the road. We used to haul that thing back and forth loaded to the gills over the Sierra Nevada Mountains, taking our lives into our own hands. Then we realized that if we stored it in the desert, we could save wear and tear on our mortality. So there it stayed for about ten years.
When the camp realized it could buy a shipping container and have it dropped off at their campsite every year without the hassle of dealing with That Trailer, the poor thing got abandoned for a few years out in the Nevada wilds. You remember that I drove out to the desert with Alex to rescue our friend the trailer, a trip with nearly fatal results.
So here it is, a 20 foot flatbed, maybe suited to my shantyboat, maybe not, needing suspension work, a coat of paint, deck repair, and maybe some repair welds.

The first thing I did was fire up my cutting torch and cut off the weird distinctive triangle things, and ground down the cuts. I always assumed they were there as a token gesture to structural reinforcement.

I replaced all the deck bolts that had rusted through, grinding off and replacing any that had loosened. The deck needed about 50 new bolts. This alone made the deck much more stable.
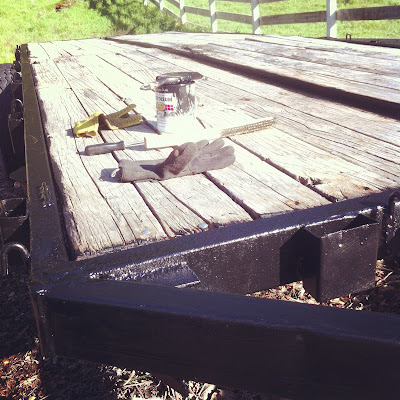
I gave all the metal on the entire trailer, top and bottom, a new coat of Rust-Oleum. I had to get suited up to prevent myself from being painted too thoroughly, climbing under the trailer and applying paint overhead.
 It looked pretty good when I was done. Though crawling around under the trailer, I saw several places where the metal was cracked, principally around the lateral beam that joined the two pairs of leaf springs on either side.
For a while, Id been sweating how to make the skids that would hold up the boat. I considered using recycled railroad ties since I could get them for free at the local trainyard, but their height and condition were too inconsistent. Eventually I got a ridiculous deal from a friend at the local lumberyard who found me some 6x6 treated lumber seconds that had a barely perceptible twist or were split a bit at one end.

I positioned the skids so one set would lie just inside of the skegs, and the other set so they lay at the outside edge of the trailer, as far out as could be secured. I figured this would support the boat along the stringers as well as give it side-to-side stability, something I thought would be extra important as we were trucking down the highway.

I drilled bolt holes through the skids and into the support brackets under the trailer.

I put big long 8 inch carriage bolts through the skids. For extra measure, I painted the bottom and tops of the carriage bolts. Lawrence joined me for a bit and serenaded me with excellent banjo tunes.
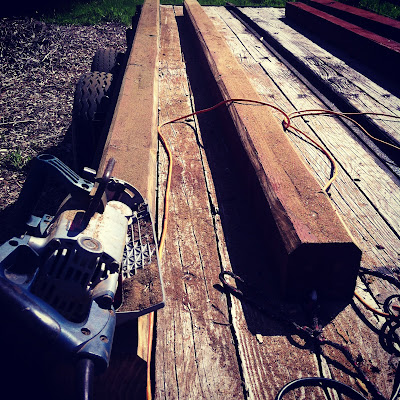
To prevent the skids from damaging the surface of the hull, I chamfered the sharp edges of the skids with my skill saw.

I cut the ends of each skid at an angle to guide the skegs while the boat was being trailered. Though honestly, I dont think the skegs at the back of the boat will be anywhere near the skids, since that end of the trailer will be deep under water and the back of the boat high above it during a boat launch or trailering. But it seemed like a good idea.

Then I covered the skids with indoor/outdoor low-pile carpet, stapling and using roofing nails at the edges.

The result was surprisingly legit looking.

Then Jen and I sat on the trailer and had a beer. Something about this trailer makes you want to sit on it and have a drink. Whats that about?
Next, the superhero of heavy duty welding flies the trailer high into the sky and melts it with his heat ray vision!
Read More..
We left the shantyboat hull pretty complete. Now that the boat is ready to be flipped, we turn our attention back to the trailer.
When the camp realized it could buy a shipping container and have it dropped off at their campsite every year without the hassle of dealing with That Trailer, the poor thing got abandoned for a few years out in the Nevada wilds. You remember that I drove out to the desert with Alex to rescue our friend the trailer, a trip with nearly fatal results.
So here it is, a 20 foot flatbed, maybe suited to my shantyboat, maybe not, needing suspension work, a coat of paint, deck repair, and maybe some repair welds.
The first thing I did was fire up my cutting torch and cut off the weird distinctive triangle things, and ground down the cuts. I always assumed they were there as a token gesture to structural reinforcement.
I replaced all the deck bolts that had rusted through, grinding off and replacing any that had loosened. The deck needed about 50 new bolts. This alone made the deck much more stable.
I gave all the metal on the entire trailer, top and bottom, a new coat of Rust-Oleum. I had to get suited up to prevent myself from being painted too thoroughly, climbing under the trailer and applying paint overhead.
For a while, Id been sweating how to make the skids that would hold up the boat. I considered using recycled railroad ties since I could get them for free at the local trainyard, but their height and condition were too inconsistent. Eventually I got a ridiculous deal from a friend at the local lumberyard who found me some 6x6 treated lumber seconds that had a barely perceptible twist or were split a bit at one end.
I positioned the skids so one set would lie just inside of the skegs, and the other set so they lay at the outside edge of the trailer, as far out as could be secured. I figured this would support the boat along the stringers as well as give it side-to-side stability, something I thought would be extra important as we were trucking down the highway.
I drilled bolt holes through the skids and into the support brackets under the trailer.
I put big long 8 inch carriage bolts through the skids. For extra measure, I painted the bottom and tops of the carriage bolts. Lawrence joined me for a bit and serenaded me with excellent banjo tunes.
To prevent the skids from damaging the surface of the hull, I chamfered the sharp edges of the skids with my skill saw.
I cut the ends of each skid at an angle to guide the skegs while the boat was being trailered. Though honestly, I dont think the skegs at the back of the boat will be anywhere near the skids, since that end of the trailer will be deep under water and the back of the boat high above it during a boat launch or trailering. But it seemed like a good idea.
Then I covered the skids with indoor/outdoor low-pile carpet, stapling and using roofing nails at the edges.
The result was surprisingly legit looking.
Then Jen and I sat on the trailer and had a beer. Something about this trailer makes you want to sit on it and have a drink. Whats that about?
Next, the superhero of heavy duty welding flies the trailer high into the sky and melts it with his heat ray vision!