Tampilkan postingan dengan label now. Tampilkan semua postingan

Senin, 21 Maret 2016

Sorry for the lack of recent posts; the winter weather and some logistical problems have slowed things down.  My previous boat has been transferred to a new owner and is now residing in Montana.  The new boat has been transferred to the trailer and fits it perfectly.  The new 75hp Evinrude E-Tec engine has been installed, and all the controls have been connected.  I still need to organize tubes & wires by wrapping and strapping them under the deck.  I had wanted a stainless steel windshield frame, but, no matter how exact and simple I made the proposed design, the metal fabrication shop still estimated the cost at $4000-5000 which just didnt fit my goal of producing a good boat at a moderate price.  So, I bought a plank of African mahogany for $68 and built my own windshield frame.  I have had the glass cut and fit for the frame.  The glass people said that they think the wood frame will look nicer than metal.  Nice to hear such comments.  The wood frame has been fabricated in four sections.  Although the four sections fit together well, I want to bond them together with epoxy while they are in place on the hull foredeck for a strong, accurate result.  The boat is now in our unheated garage with outside temperatures mainly below freezing.  The epoxy will require warmer temperatures.  It may be awhile before the final assembly of the windshield takes place, but, in the meantime, I can clamp and screw the windshield in place well enough to have a boat cover fabricated.

The windshield frame was designed mathematically.  It is a system which works incredibly well for me.  Everything is done in an X,Y, Z coordinate system.  After building two mock-ups, I elected to build a windshield 12.5 inches high which slants aft 10.5 inches from bottom to top and is 53.5 inches wide with rectangular sections.  Knowing also the offsets of the deck curvature, I was able to calculate the angle of intersection of the two front panels, 16.54 degrees, the angle of intersection of the front panels to the deck, 42.48 degrees, and the angle of intersection of the side panels to the deck, 9.09 degrees.  All the linear dimensions were calculated to similar accuracy.  When cut to those angles in the shop before assembly, the panels fit together well.  I cant imagine how much more difficult it must be to use trial-and-error, cut-to-fit methods.

We were in Bocas Del Toro, Panama recently and I brought back some pictures of abandoned, hollowed-out-log cayucos and the pangas which have replaced them to a great degree.  When we lived there 30+ years ago, our local maid said she wouldnt trust a boat which was made with adhesives instead of from a single tree trunk.  Times have changed.


Read More..
Remember the trailer? This one, the one that almost killed us?


We left the shantyboat hull pretty complete. Now that the boat is ready to be flipped, we turn our attention back to the trailer.

It is really a rusty, janky old thing. Ive owned it for fifteen years or so, or sorta owned it since I bought it with Sean for our Burning Man theme camp, the Costco Soulmate Trading Outlet. Its been stolen and recovered, broken and repaired on the road. We used to haul that thing back and forth loaded to the gills over the Sierra Nevada Mountains, taking our lives into our own hands. Then we realized that if we stored it in the desert, we could save wear and tear on our mortality. So there it stayed for about ten years.

When the camp realized it could buy a shipping container and have it dropped off at their campsite every year without the hassle of dealing with That Trailer, the poor thing got abandoned for a few years out in the Nevada wilds. You remember that I drove out to the desert with Alex to rescue our friend the trailer, a trip with nearly fatal results.

So here it is, a 20 foot flatbed, maybe suited to my shantyboat, maybe not, needing suspension work, a coat of paint, deck repair, and maybe some repair welds.


The first thing I did was fire up my cutting torch and cut off the weird distinctive triangle things, and ground down the cuts. I always assumed they were there as a token gesture to structural reinforcement.


I replaced all the deck bolts that had rusted through, grinding off and replacing any that had loosened. The deck needed about 50 new bolts. This alone made the deck much more stable.


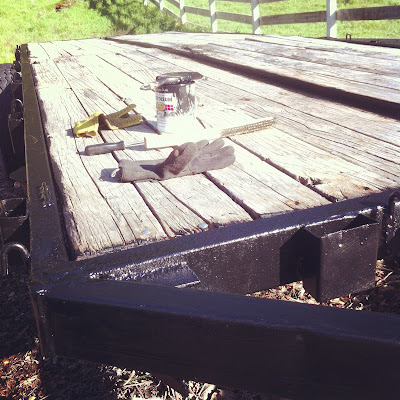
I gave all the metal on the entire trailer, top and bottom, a new coat of Rust-Oleum. I had to get suited up to prevent myself from being painted too thoroughly, climbing under the trailer and applying paint overhead.

It looked pretty good when I was done. Though crawling around under the trailer, I saw several places where the metal was cracked, principally around the lateral beam that joined the two pairs of leaf springs on either side.

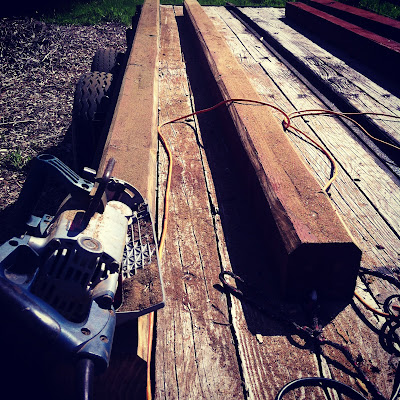
For a while, Id been sweating how to make the skids that would hold up the boat. I considered using recycled railroad ties since I could get them for free at the local trainyard, but their height and condition were too inconsistent. Eventually I got a ridiculous deal from a friend at the local lumberyard who found me some 6x6 treated lumber seconds that had a barely perceptible twist or were split a bit at one end.


I positioned the skids so one set would lie just inside of the skegs, and the other set so they lay at the outside edge of the trailer, as far out as could be secured. I figured this would support the boat along the stringers as well as give it side-to-side stability, something I thought would be extra important as we were trucking down the highway.


I drilled bolt holes through the skids and into the support brackets under the trailer.


I put big long 8 inch carriage bolts through the skids. For extra measure, I painted the bottom and tops of the carriage bolts. Lawrence joined me for a bit and serenaded me with excellent banjo tunes.


To prevent the skids from damaging the surface of the hull, I chamfered the sharp edges of the skids with my skill saw.


I cut the ends of each skid at an angle to guide the skegs while the boat was being trailered. Though honestly, I dont think the skegs at the back of the boat will be anywhere near the skids, since that end of the trailer will be deep under water and the back of the boat high above it during a boat launch or trailering. But it seemed like a good idea.


Then I covered the skids with indoor/outdoor low-pile carpet, stapling and using roofing nails at the edges.


The result was surprisingly legit looking.


Then Jen and I sat on the trailer and had a beer.  Something about this trailer makes you want to sit on it and have a drink.  Whats that about?

Next, the superhero of heavy duty welding flies the trailer high into the sky and melts it with his heat ray vision!


Read More..

Sabtu, 19 Maret 2016

In 2003 7th generation fishing industry Kristen Mustad brought to life a vision to that would forever change the fly fishing reel industry. In that year Kristen bought out the small company of Old Florida Reels and in 3 months showed the fly fishing industry the first Nautilus CCF #8 Fly Reel. Since its introduction Nautilus Reels have become the benchmark that all sealed disc drag fly reels must be measured against and most reels in this class today still fall short of the standard that Nautilus Fly Reels established on this day in history. 

CCF-X2

CCF-X2
Ten years after the introduction of the industry changing CCF(cork and carbon fiber) fly reel, Nautilus unveiled a completely new version named CCF-X2. Besides stunning new looks the X2 doubles the drag strength (20lbs+) while being smoother and with less start-up inertia than the former CCF. If you were familiar with the former CCF reels you want to know that a major change in this model is that the retrieve is now switchable without need of replacing the complete drag hub. Not only is this a good feature for the new angler trying to determine what retrieve is best for them but also a huge help for the dealer to maintain and provide reels without concern of what retrieve they are.

The New CCF-X2 Silver King
Spey Rings
New for 2015, The addition of The Silver King completes the CCF-X2 lineup with a true large arbor 5 inch reel designed to tackle all things Silver. Each crank of the big game handle can retrieve up to 14" of line per turn. Like the smaller CCF-X2s its packed with features like Sealed drag, hybrid ceramic bearings, TPX bushings and an over-sized drag knob capable of dialing up more than 20 lbs of drag force.
Two hand enthusiast will be glad to know about the Silver King innovation of Spey Rings. Spey Rings eliminate the need for a fully caged reel by reducing the tolerance between spool and frame to stop thin shooting lines from escaping between the gap.

FWX (Feather Weight Xtreme)

Feather Weight Xtreme
FWX - Technologies
The second series of reels to come out of the Nautilus factory was the FW (Feather Weight) Series. These lightweight Trout to Bonefish sized reels became an instant success. The SCF (Sealed Carbon Fiber) drag system provided unparalleled performance in a small scaled down version of the award winning  CCF and NV series reels. An FW revision took place in 2011 and Created the FWX. Since then its sales have proved to be one of the most popular reels of all time. With additions like Giga Arbor, Torque X and the wildly popular LASER-ID for easy write your own line identification on the spool has pushed this reel into history changing status.

NV-G (~EN-VEE)

NV-G

Conceived in 2007 the NV has won many awards over the years.  At the heart of this reel is a NVCCF Drag Hub capable of taming any beast you pursue. While the original NV has seen many changes over the years the guts and frame remain the same today as the first NV that rolled off the production line. Some things are better left unchanged! 

The list of technologies in the NV-G Reels is impressive to say the least. 


Starting with the heart of the reel is the sealed NV-CCF drag hub. Inside this hub is two ceramic thrust bearings ensuring the smoothest drag on the market. The Cork Carbon Fiber hub fits over a titanium shaft and sealed by the Nautilus exclusive Activseal
which perpetually repels water and contaminants from entering the system creating a reel that is impervious to the elements. Moving out from the heart of the reel is the  G-Spool design that transformed the original NV reel to what Nautilus has defined as Über Arbor fly reels. The G-Spool (Giga spool) is what puts the "G" in NV-G and enabled a design that significantly reduces weight
and generates faster line retrieval. The G-Spool also allows for your backing to dry much faster than traditional spool designs by allowing air to circulate through the open arbor all of which helps reduce corrosion cause by prolong wet backing. Your backing almost appears to float on the arbor.

LASER-ID standard on all Nautilus reels

In addition to these high tech features are some really awesome user friendly stuff you wont find on other reels. LASER-ID is one of my favorite features. Simply use a sharpie to write on the spool what line it is. No more tacky stickers that fade and fall off leaving sticky dirt trapping spots on you fly reel. If you need to change the ID just dab a little spot remover on the laser etched area and its ready to go again.


Hooker comes standard on NV-G reels and is available as an optional add on to all Nautilus fly reels. This little peg comes off the reel seat and lets you wrap your line on it or hook a fly to it.

NV - Spey


NV - Spey
Within the NV Series is two sizes of spey specific reel sizes. Using the existing NV-G 8/9 and NV-G 9/10 frames Nautilus has created two Spey specific spools. The Spools feature tighter tolerances for the use of thinner running lines. Capacity is also increased to accommodate the larger size of Spey lines.  The great feature of this design is the same reel you are using today for Permit or Bonefishing could be fishing Steelhead tomorrow in the Northwest with just the change of a spool. Instead of just increasing the spool size to match spey angler needs Nautilus also gave these spools their own unique look and intentionally made them a bit heavier to aide in balancing two hand spey rods.


NV to NV-G changes

As I mentioned earlier the NV to NV-G has seen many changes over the years while the heart of the reel has remained unchanged. Any NV no matter when it was purchased still is 100% compatible with todays available spools. So if you have an older NV and you wish to purchase an extra spool or gain the benefits of the G-Spool or purchase a Spey spool than youre in luck. These charts can help sort it out. The easy way I have found to match past to present is think about it in term of reel diameter. (IE; If you have a past NV 8/9 this is a 4" reel. Todays 4" reel is a NV-G 7/8) Measuring the outside of the spool rim will tell you what the diameter of your reel is.

COMPATIBILITY TABLE 
NV-G
NV
5/6 Frame
NEW*
6/7 Frame
NEW*
7/8 Frame
Compatible with
8/9 spool
8/9 Frame
Compatible with
10/11 Spool
SPEY 400-550 Spool
9/10 Frame
Compatible with
11/12 Spool
Spey 450-750 Spool
10/11 Frame
Compatible with
NV Monster

Specs for all Nautilus NV-G series reels as of 3/18/2015
ModelLineCapacityWeightDiameter
NV G-5/65/6WF6+(125yds20#)5.1 oz.3.50"
NV G-6/76/7WF7+(150yds20#)5.7 oz.3.75"
NV G-7/87/8WF8+(200yds20#)6.6 oz.4.0"
NV G-8/98/9WF9+(200yds30#)7.2 oz.4.25"
NV G-9/109/10WF10+(200yds30#)8.3 oz.4.50"
NV Monster11/13WF12+(350yds30#)9.9 oz.5.0"
NV Monster
G-10/11
10/11WF10+(225yds30#)9.9 oz.5.0"
NV SPEY
400-550
SPEY
550gr head with .030 running line
+(150yds30#)
8.1 oz.4.25"
NV SPEY
450-750
SPEY
750gr head with .030 running line
+(150yds30#)
9.1 oz.4.50"

About the only trouble youll experience with a Nautilus reel is getting one. Really this is a good problem. What I mean is since becoming k

Read More..