Tampilkan postingan dengan label hull. Tampilkan semua postingan

Kamis, 24 Maret 2016


The new hull has now been sheathed in 6mm marine plywood.  This entailed making eight scarf joints.  A 9/1 scarf slope was used with all panels being beveled using a hand plane.  For me at least, the hardest part of beveling the scarfs seems to be to hold the plywood absolutely flat.  Thin plywood has a tendency to bow slightly either up or down, so I built an 8-foot jig and used multiple clamps to hold the plywood straight and level.  Four of the scarf joints (the short pieces) were bonded on the jig and four were bonded on the hull itself with equally successful results.  I did not want to try to position, epoxy bond, and clamp 19-foot panels by myself on the hull frame.  The hull was designed with flat cross-sectional panel sections located eight feet from the stern with backing plates (3/4" lumber) for the future joining of fore and aft panels.  That way I was able to split the sheathing task into forward 11-foot panels and aft 8-foot panels.   Each piece needs to be positioned precisely after being pre-coated with fresh epoxy; it needs to be done somewhat quickly so that the epoxy is still in a easily flowable and penetrating state, and then cleanup to remove squeeze-out and drips needs to be completed.  Especially at the hull forefoot and topside stern tumblehome, the panels need to easily bend to significant curvatures.  Thus, these panels were soaked in a shallow basin of water for two hours and then temporarily clamped in place until they dried out.  In this way they adopted a pre-warp to more easily conform to the curvature and required much less clamping force when permanently bonded.  The plywood sheathing will provide the foundation for the next layer of hull coating, 5mm thick planking.  This will be followed by fiberglass cloth and more epoxy resin.
Read More..

Minggu, 20 Maret 2016

We fretted over fiberglassing the hull so much, we put off beginning with this step for weeks.  We read and reread our instructions from Glen-L, Ken Hankinson Fiberglass Boatbuilding book, and anything else we could find.  We went over scenarios and thought of terrible things that could go wrong.  We thought it would be so harrowing and difficult, that in the end, it was a bit of letdown.

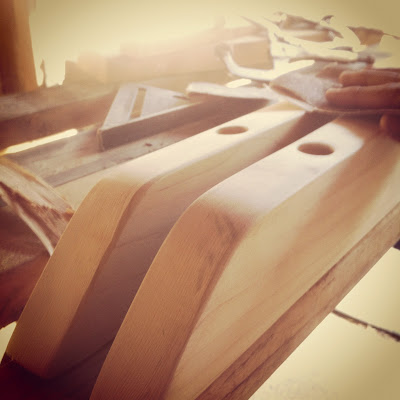
Heres where we left the boat last time.  Filled, shimmed, routed, sanded lovingly.  Lawrence came by a couple times and asked, "What are you building, a boat or a piece of fine furniture?"


Before we started the day, we had to wipe the whole boat down and make sure there was no sawdust, grease, debris, or anything anywhere.


But really, this was just the seal coat, the first of four or five coats wed put on the hull.  We wouldnt even get out the glass cloth until the next coat.

And now a quick primer on fiberglass:  Fiberglass is a composite laminate material.  The layer(s) of spun glass cloth or mat embedded in a matrix of polyester or epoxy resin are what gives it strength.

In some boats where the hull derives its strength from the fiberglass, it is typical to use alternating layers of mat (a loosely woven nest of randomly aligned spun glass) and glass cloth.  In our boat, the fiberglass covering on the plywood hull served only the purpose of keeping it watertight and creating a durable wear-resistant maintenance-free surface.  So we had only to put one layer of glass cloth between several layers of epoxy.


There are many methods of applying fiberglass to a boat hull, but they break down to the so-called wet and dry methods.  "Wet" means the fiberglass cloth (or mat) is laid over a just applied layer of resin and then "wet out" with more resin on top.  This sounded hectic. We imagined laying cloth over a wet sticky layer of resin and fighting wrinkles and having the cloth misaligned and pulling our hair out and getting sticky head to foot.

We were relieved to discover in our Glen-L instructions that they recommended the dry method.  "Dry" means simply that the first coat is rolled out without the cloth and allowed to set.  Then the cloth layer is laid out over this dry layer and more resin on top of that to wet it out.  This allows us to carefully align the cloth without the stress of either sticky goo or the ticking clock.


In this first seal coat, all we were doing was covering the hull with epoxy.  Kai mixed up big batches of epoxy and put them in paint trays for me to roll out with a dense foam roller.


Then Kai came around with extra resin and touched up spots Id hit too lightly and brushed down any air bubbles.  Because we werent mixing the resin with filler, it had a longer pot-life and so didnt tend to kick off early, even though we were mixing it in larger quantities.


The result was beautiful, though vaguely reminiscent of a horribly outdated style of 70s handmade varnished pine bedroom furniture.


Though it was a hot day in the barnyard, we were feeling pretty good about our work and the results.

Read More..
wooden v hull boat plans

Wooden V Hull Boat Plans


In order to help out some of our visitor that also participate and looking for wooden v hull boat plans in this great past-time, I decided to go above and beyond and include simple, easy-to-follow, step by step instructions with all of wooden v hull boat plans. Since I don't have the time to mentor every person I meet that is interested in learning to build boats, I felt like this was the best way to give back.

The illustrated wooden v hull boat plans that I've created are of such high quality, that those that I've shared them with have said it's just not right to keep these stashed away in a private archive only to be seen by a select few. The plans for wooden v hull boat plans offered here on the website are based upon my many years of boat building experience, you'll find no better source of information and proven boat plans anywhere on the internet!

>> Get wooden v hull boat plans here <<
Read More..

Sabtu, 19 Maret 2016

Here we drill all sorts of holes in our newly made skegs and finish them.

You know, it really helps to have the right tools. And you know what helps having the right tools? Money. I dont got none of that, so I have to make do with the tools I have. And sometimes that is a ridiculous process.


Here I am trying to level my handheld power drill in a slightly broken garage sale drill press with a bit that isnt quite long enough to go through the piece.

I have to drill bolt holes in the skegs. Then I have to drill through the newly fiberglassed and sealed hull to insert the bolts through structural members in the frame.


First I drilled a countersink to hide the head of the carriage bolts, then a hole through the skeg.


I placed the skegs in position on the hull, and then used a long bit to drill through the skeg into the hull and into the structural member of the boat.


Then I went under the boat and countersunk all the receiving ends of the bolt holes.


Actually, Im lying. But thats probably how I would do it now if I did it again. I doubted the accuracy of drilling down into the hull from above, so I marked the desired hole locations under the boat and drilled up. Then I marked the locations of the actual holes on the skegs. Then I took the skegs into the barn and used my sketchy drill press to drill the bolt holes in the skegs.

After all this stressful drilling, I finished the skegs with stain and a couple of coats of UV blocking polyurethane.


Next we install the skegs in the hull. Not once, but twice. Ahem.
Read More..

Rabu, 16 Maret 2016

Everyones got one.

Every now and then Ill ask a boat-related question on a public forum or email list.  It sure isnt a problem getting people to weigh in with their opinion, thats for sure.  The challenge, actually, is picking through the dross of misunderstanding, inaccurate information, speculation, and completely made-up answers to find the grains of expertise and knowledge.

This is precisely why I picked the boat designer I did, because they has already provided me with a wealth of trustworthy and well-respected information about boatbuilding before I ever bought my plans (read Boat Plans: Choices Made and Not Made).

For the most part, during my build, Ive hewed pretty close to the plans and the recommendations of the boats designer.  Im all for experimentation, but Im also deeply respectful of the experience and expertise of those who came before me.


In the planning stages, there were boats I liked that came close to what I wanted, but differed in some way from my vision of our little shantyboat.  I definitely flirted with the idea of taking those plans and making significant modifications.

I resisted that urge, for the most part, and picked a boat design that met my needs, at least in terms of hull design.  


For the changes I did plan to make, I had the good fortune to be able to talk to my boats naval architect and get his advice on these modifications (read Questions for the Old Man).

The opinion in boatbuilding forums is often to take this design and lengthen it, or add one of those or one of these.  And Im sure for those experienced boatbuilders, such modifications would be a breeze.  But what about the first-time boatbuilder, the person just starting out?

I think people get excited sometimes about sharing what they know, but forget that there is a bigger picture.  Too often, I think that picture holds the very real possibility of a half-built boat collecting rainwater in the backyard of a frustrated amateur boatbuilder.


Read More..